MIDI Mapping
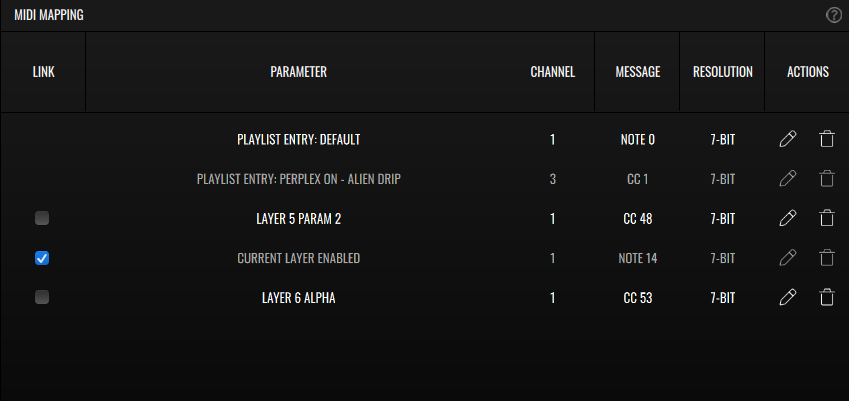
All your MIDI mappings are displayed in the MIDI Mapping panel. To create a mapping, enable the MIDI Learn mode located in the Status Bar. Clicking a parameter and sending a MIDI message from your controller will establish the mapping. You can also double click a highlighted control to manually enter mapping information. Toggle MIDI Learn off to finish mapping.
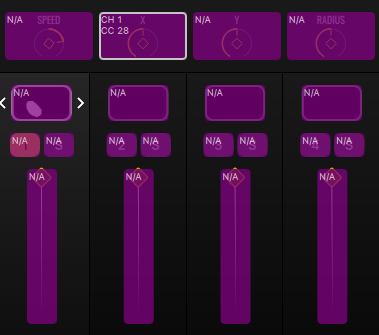
The MIDI Mapping panel displays the mapped Parameter name alongside the Channel, Message (type and number), Range and Resolution. Under Actions you can delete the mapping or open the MIDI Assign dialog, where you can configure the mapping.
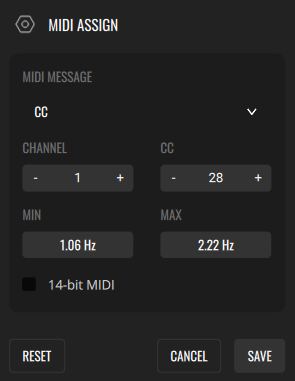
- MIDI Message - Select between a Note and a CC (control change) message.
- Channel (1 - 16)
- CC/Note (0 - 127)
- Min/Max - Set the mapping range minimum and maximum values.
- 14-bit MIDI (CC only) - Enable this if you’re mapping to high resolution MIDI CC messages. Some high-end MIDI controllers may need this.
- Reset - Delete the mapping.
- Cancel
- Save
The Link option is available for mappings of Layer parameters (those displayed in the Mixer panel). When enabled, the MIDI message will control the parameter in that position for the selected layer. By MIDI mapping Layer selection and all Layer parameters in Link mode, you can have flexible control of your Layers.