Chorder Module - LK Help
The Chorder module lets you play from a huge variety of chords with a single tap, as well as strumming notes of a selected chord.
Depending on the selected mode, you will find different fields in the status bar, located at the top of the screen:
- MODE - Toggle between MIDI and LIVE modes.
- TEMPO - Adjust tempo. This affects the arpeggiator. In LIVE MODE, this also sets the Ableton Live session tempo.
- DEVICE (MIDI MODE) - Select output MIDI device.
- CHANNEL (MIDI MODE) - Select output MIDI output channel.
- SELECTED TRACK - In MIDI MODE, select the Matrix track. In LIVE MODE, change the selected Ableton Live track.
- TRACK ARMED - Arm the select track.
- REC. QUANT. - Set recording quantization. Quantizes the recorded notes to the designated beat division.
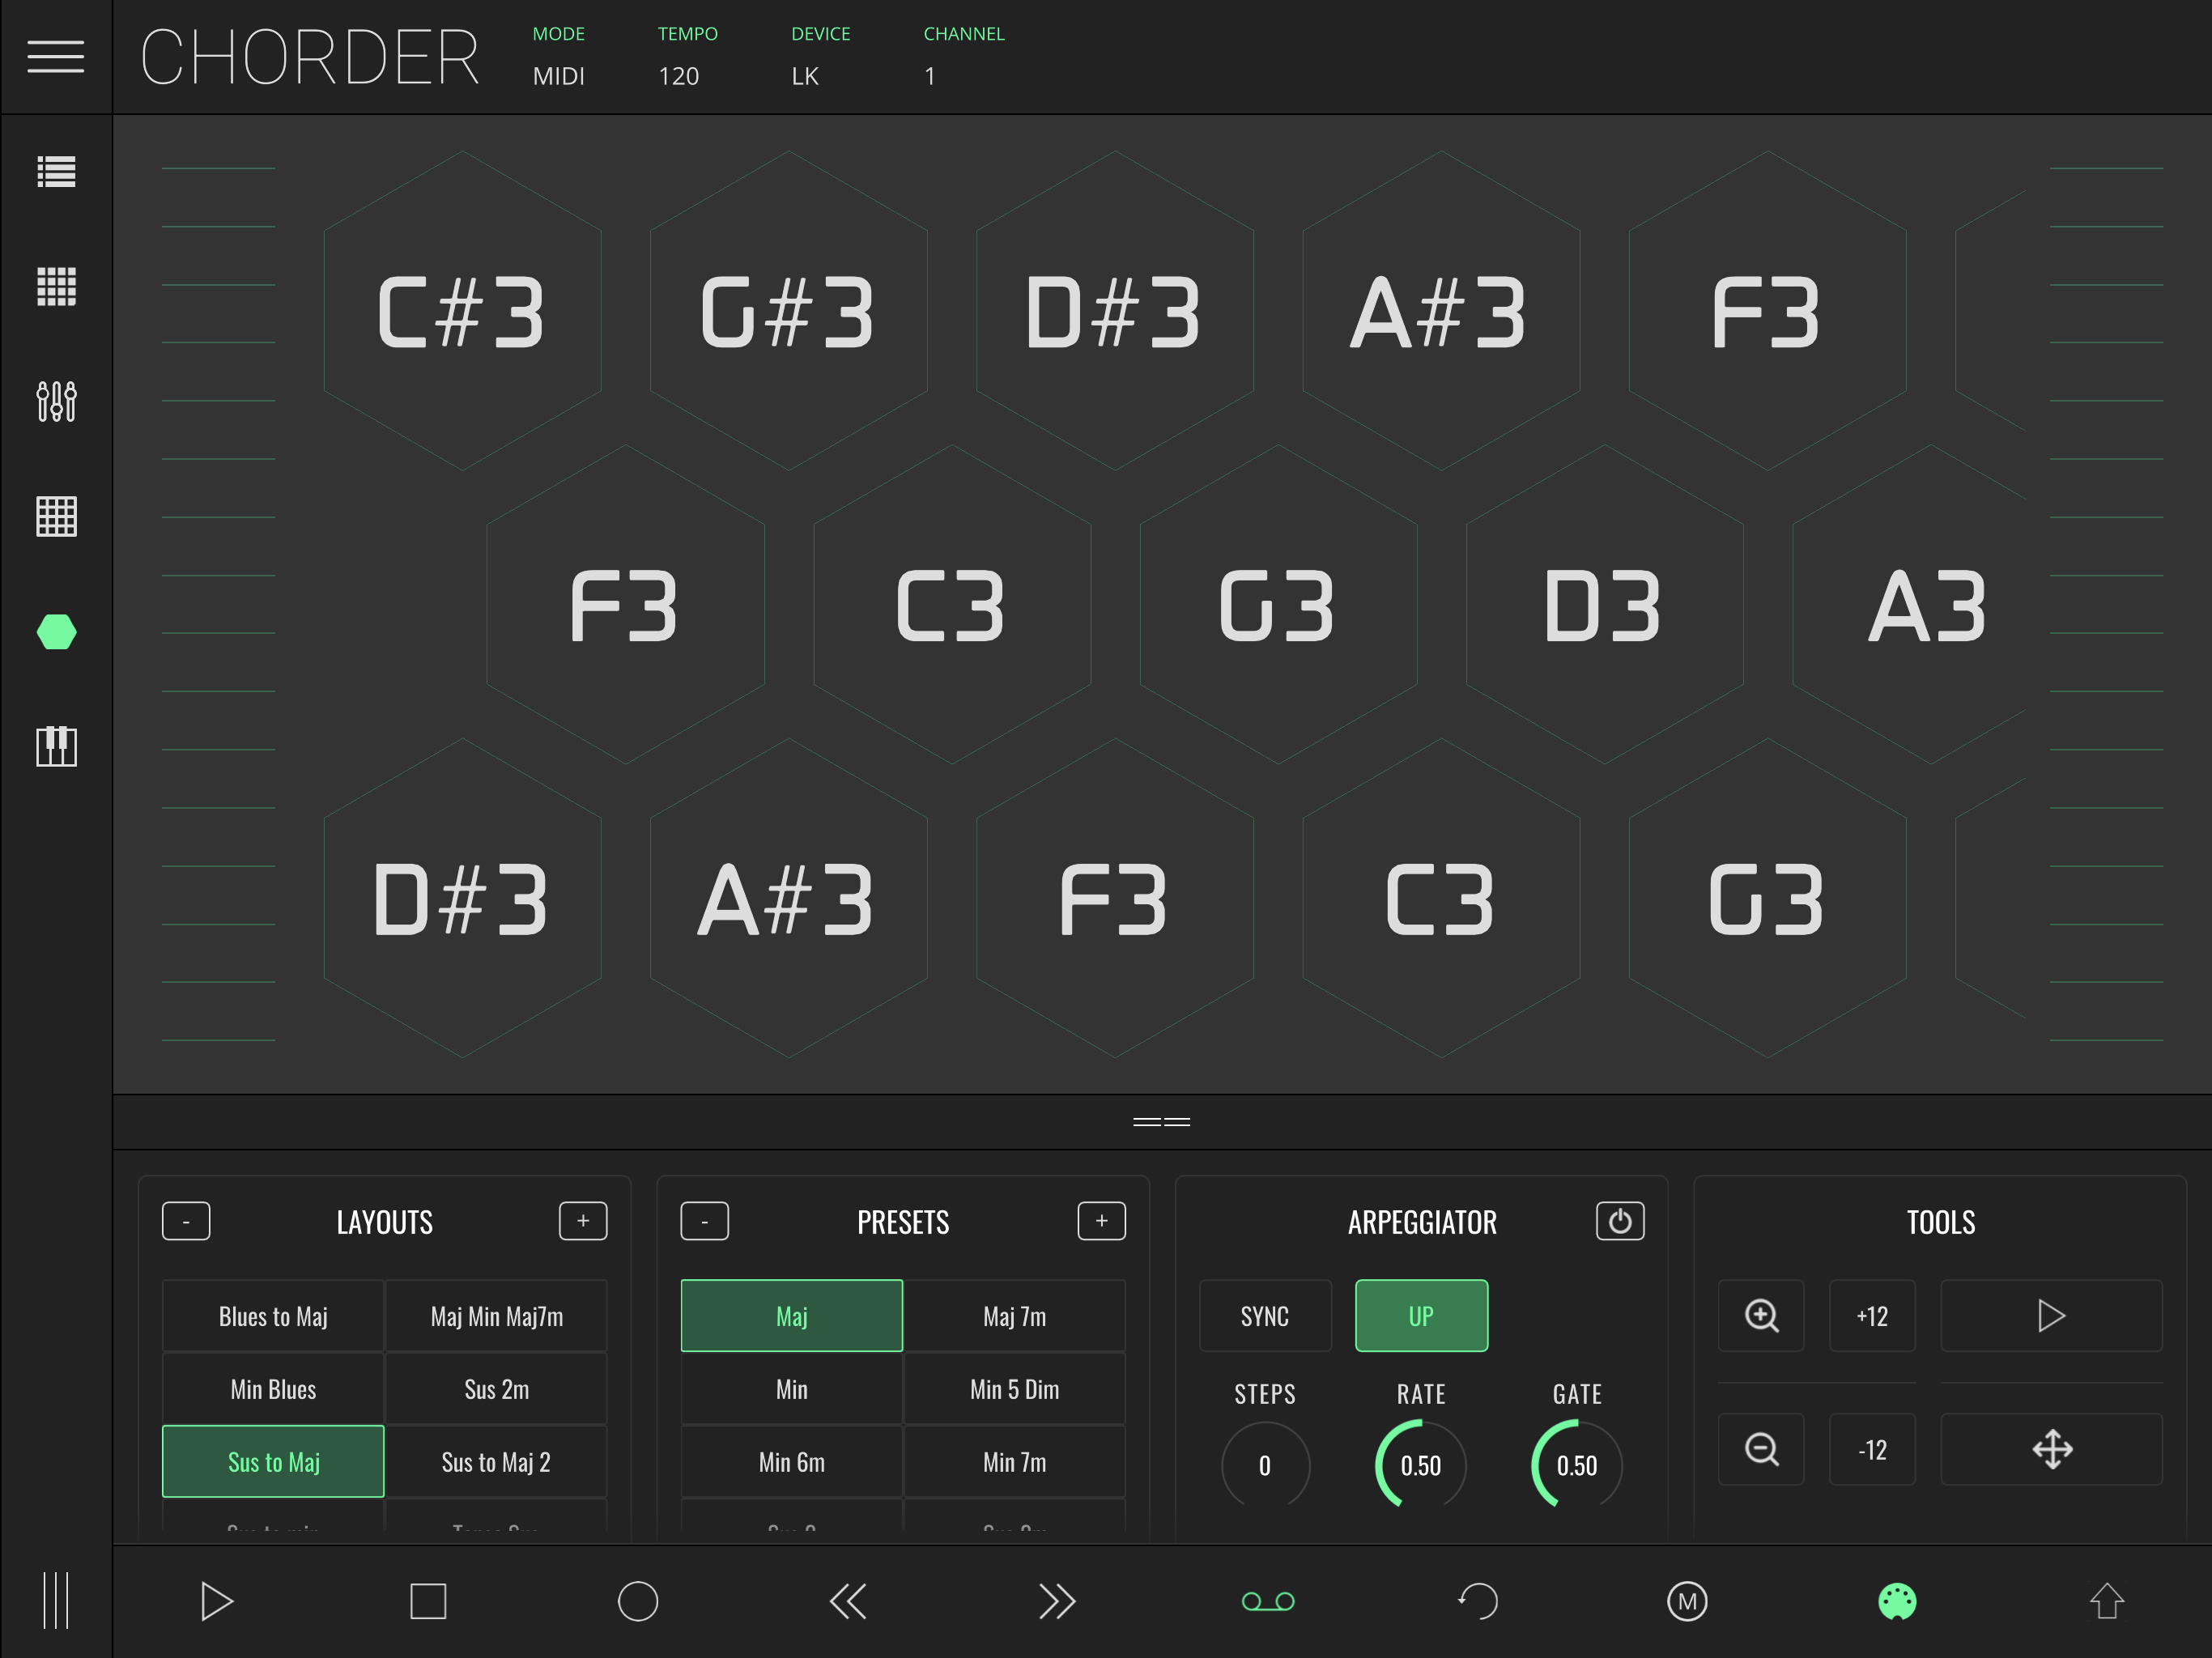
The playing section of the Chorder is divided in two parts, the keys and the strummer. In the middle section of the Chorder is where the hexagon cells are layed out, each cell representing either a note, or a chord.
Each row represents a preset, which in turn consists of a group of chords. Rows may be added and removed by toggling the presets under PRESETS. A Layout consists of a group of presets; selecting from the available layouts will toggle different selections of presets.
On each side of the screen are small horizontal lines stacked vertically for strumming, or playing like one would do on a string instrument. Each line represents a note from the selected chord across different octaves.
Like all other LK modules, the Chorder module has an Inspector panel that you can open by dragging the == icon in the bottom, or tapping anywhere else inside the bar to maximize/minimize.
Layouts
A layout is a set of presets. Layouts can be recalled by pressing the corresponding name. To create a new layout, ensure that the desired presets are active and press the + button. This will pop up a dialog box to fill in the name for the intended layout. Any user defined layout can be deleted. Ensure that the layout is selected and then press the - button.
Presets
Presets are groups of chords. This section allows the stacking of factory bundled or custom user presets.
To insert a preset in the playing section just press the corresponding preset. The chords will appear in the playing section. Selecting and de-selecting presets will add and remove them from the playing section, letting you have as many rows of chords as you need.
Preset Creation
To create a new set of chords, press the + button in the upper right corner of this section. A new screen will appear with the controls for scale and chord customization.
This screen is divided into three rows:
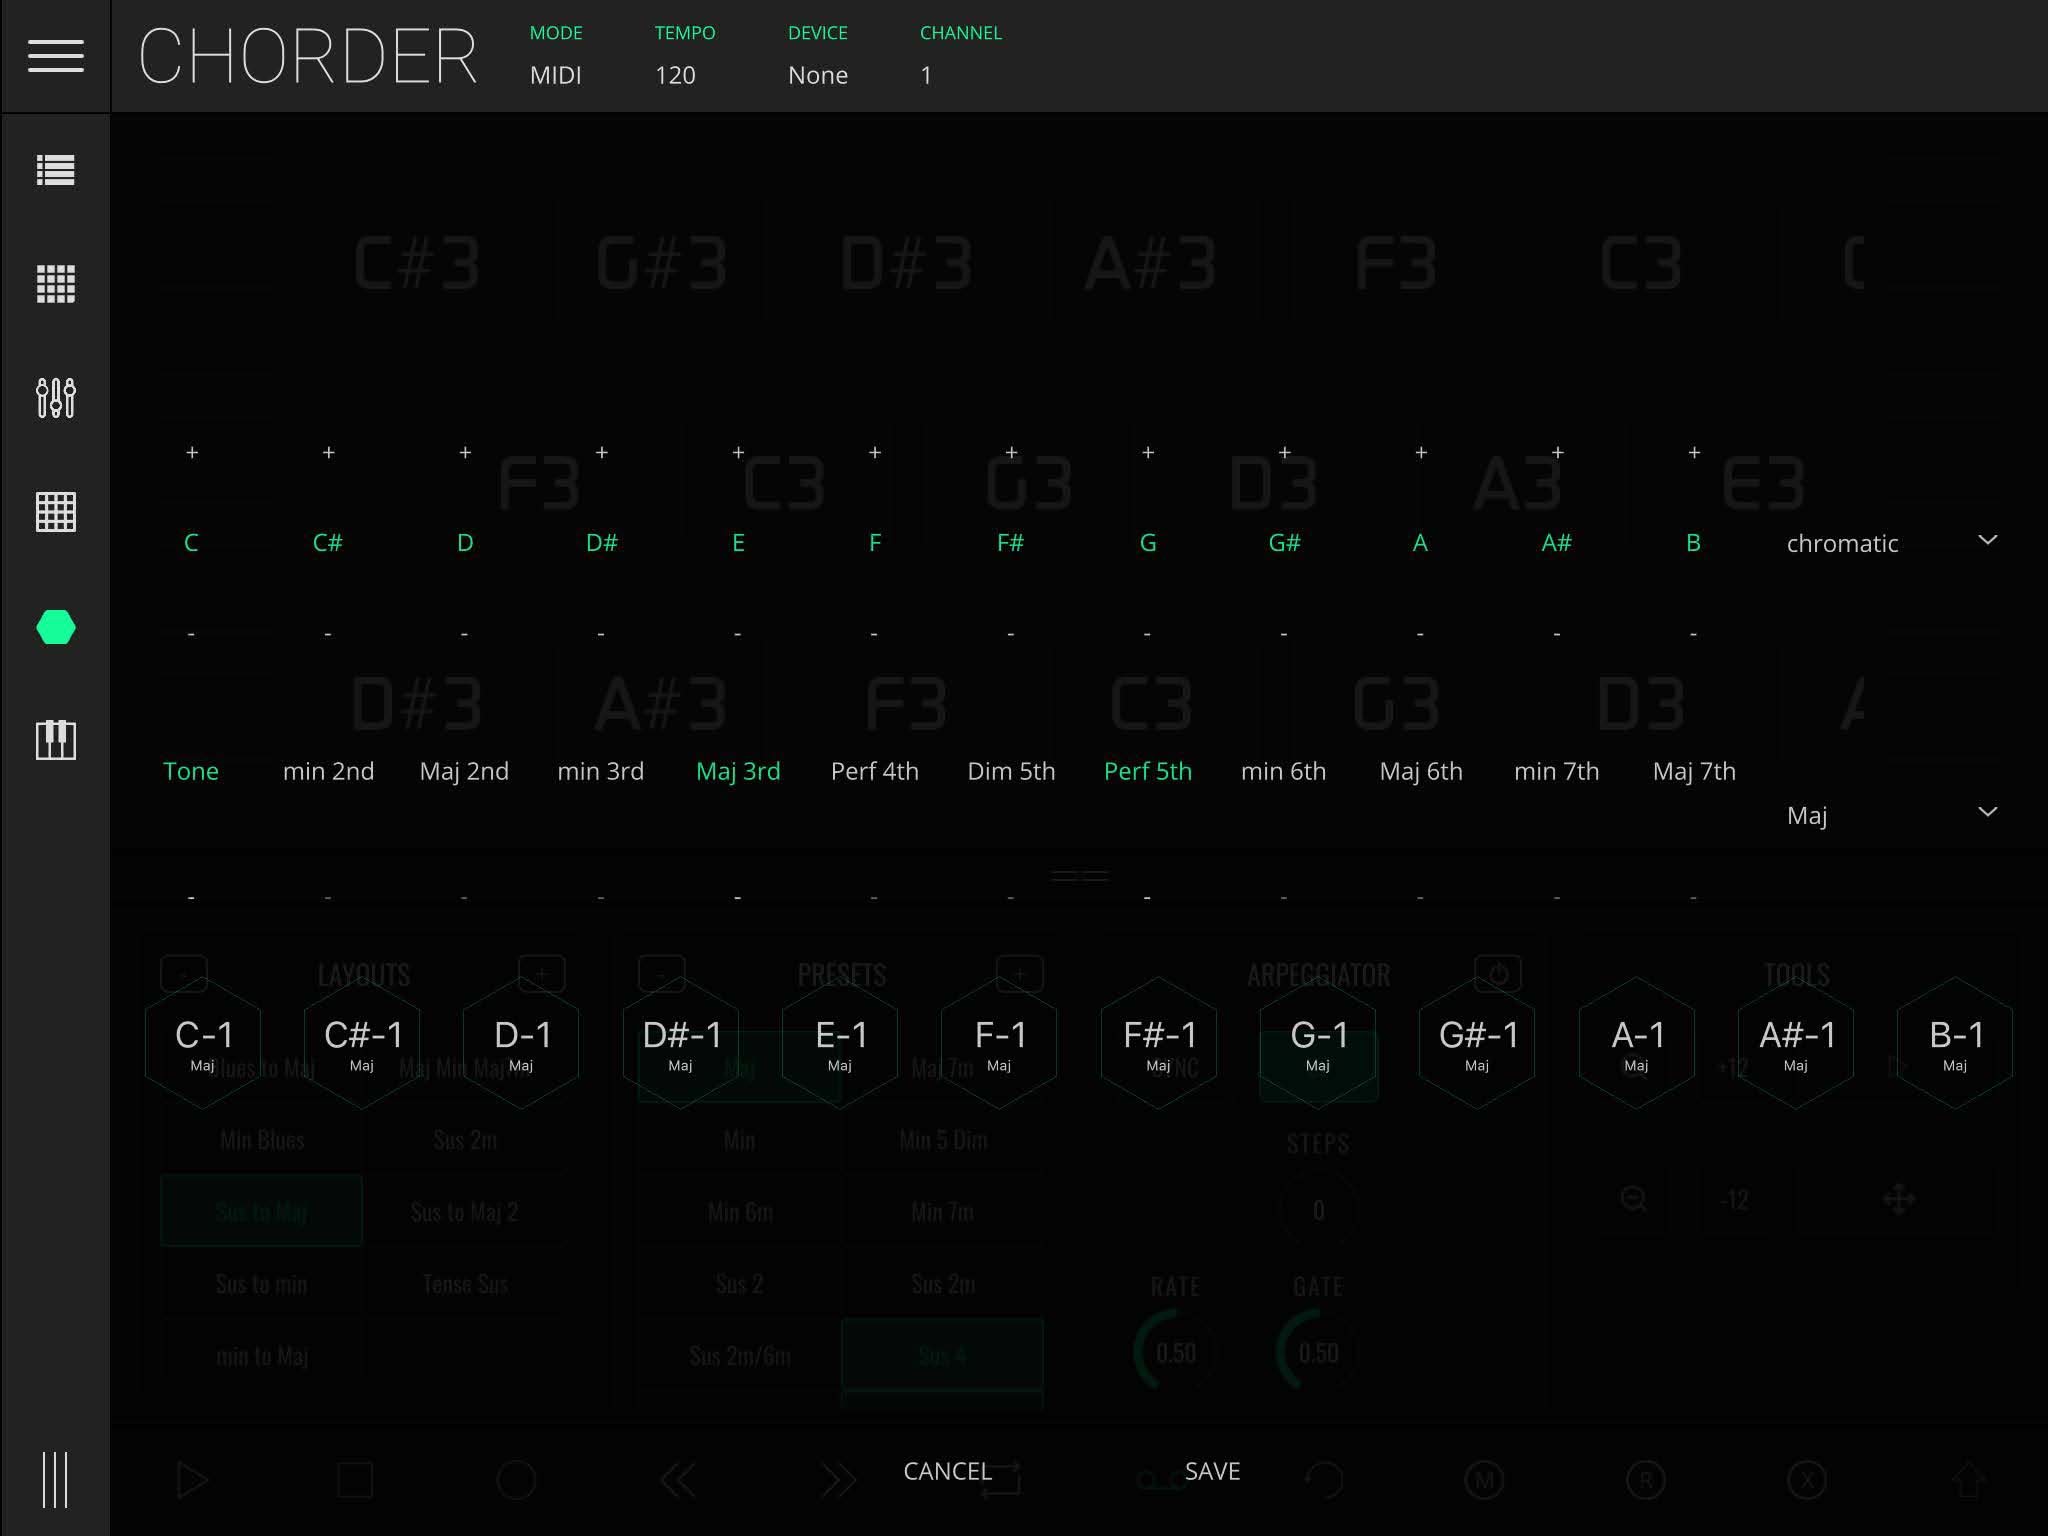
The first row represents the scale: here the 12 notes of a chromatic scale are displayed, and known scales can be selected on the right side of the row. The scale determines the root notes of the displayed chords. For each key selected, a pad will be available.
Customization is also possible by pressing to select or remove keys from the scale, as well as changing the octave of the respective key by pressing the + and - buttons above and below the key.
The second row represents the chord intervals: use this row to build your chord. Pressing the interval name adds or removes the interval from the chord, and pressing the - button under it places it one octave lower. Each pad will play this chord (with its key serving as root note).
The third row is a preview of the preset: use this row to test your preset.
Arpeggiator
The arpeggiator has the following parameters:
- ON - Toggles the arpeggiator on/off.
- SYNC - Synchronises the arpeggiator to the tempo.
- MODE - Order in which the arpeggio notes will be played.
- UP - Notes are played from low to high.
- DOWN - Notes are played from high to low.
- UP/DOWN I - Notes are played from low to high and then from high to low.
- UP/DOWN II - Notes are played from low to high and then from high to low but repeating the highest and lowest notes.
- RANDOM - Notes are played at random.
- STEPS - Number of octaves the arpeggio will go up to.
- RATE - Arpeggiator rate.
- GATE - Length of each note event (time on vs time off).
When sync is off, arpeggiator rate units are in milliseconds. Turning sync on synchronises the arpeggiator to beat divisions, ranging from 2/1 to 1/128 including dotted and triplet values.
Tools
These settings allow you to change the Chorder viewport to your needs. Use the -/+ buttons to zoom out/in the viewport.
Use the buttons labeled with -12 and +12 for a full octave transpose of all the keys simultaneously.
To pan, hold the pan button down (the bottom right button with 4 way arrows on) and then drag within the viewport.
The mode key (top right button) toggles between a play icon and a stop icon. When the play icon is displayed, tapping a chord will play it. When the stop button is displayed, tapping a chord will select it without playing it. Useful for selecting which notes appear in the strumming zones.