X/Y Pad Module - LK Help
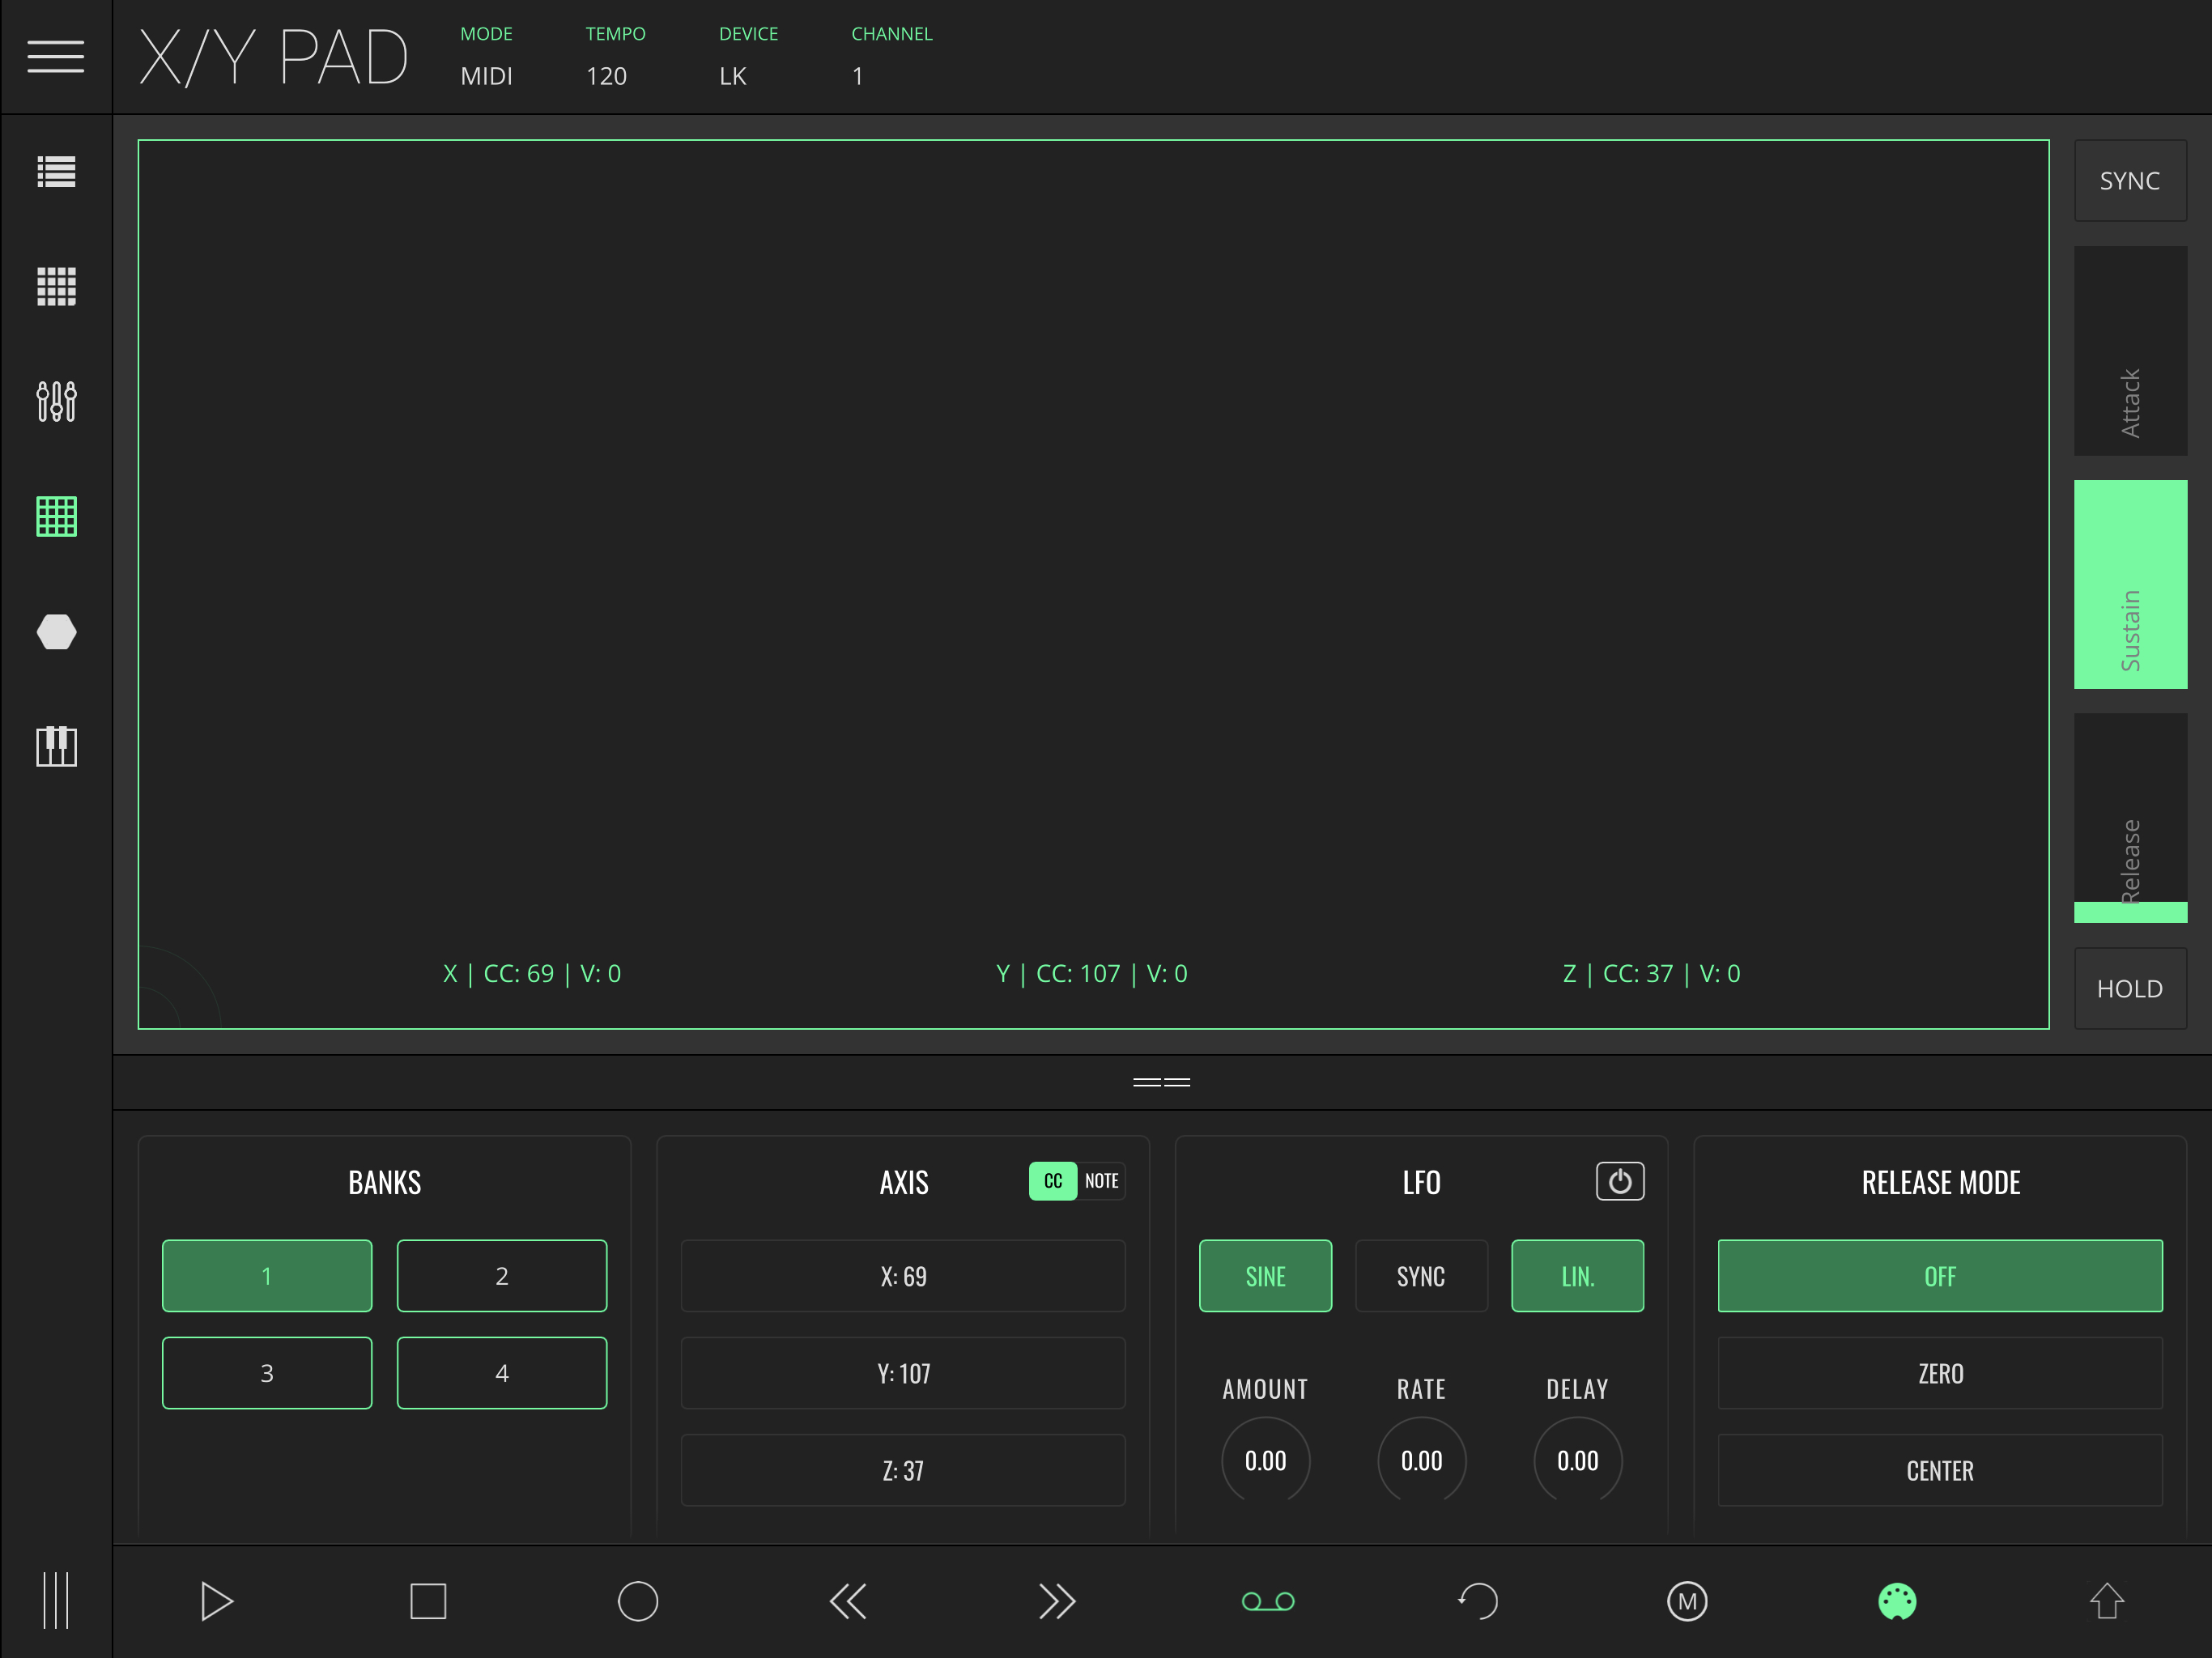
This module features an X/Y Pad with additional modulation tools, including four banks, three mappable axis per bank, one ASR envelope generator for the Z axis with configurable release mode and an LFO for automated X/Y position modulation.
The X/Y Pad section has two modes: MIDI mode, used to send MIDI to external hardware or other apps/software, and Live mode, used to control different parameters in Ableton Live. The mode can be toggled by tapping MODE in the Status Bar.
Depending on the selected mode, you will find different fields in the Status Var, located at the top of the screen:
- MODE - Toggle between LIVE and MIDI modes.
- TEMPO - Tempo adjustment. This affects the LFO and the ASR envelope's synched timings. In LIVE MODE this also sets the Ableton Live session tempo.
- DEVICE (MIDI MODE) - Select MIDI output device.
- CHANNEL (MIDI MODE) - Select MIDI output channel.
- BANK - Switch between the four different banks of controls.
- IMPORT - Import banks from a JSON file.
- EXPORT - Export all banks as a JSON file.
The ASR envelope generator
The Z axis (touch on/touch off) triggers an ASR (Attack, Sustain, Release) envelope generator, with controls located on the right.
Attack defines how long it takes Z to grow from 0 to the Sustain level, while Release defines how long it takes Z to decrease from the Sustain level back to 0.
Two additional control functions are available: SYNC and HOLD. Sync allows the release time to be synced with the tempo while Hold lets you to release the pad without triggering the release of the ASR.
Settings
Dragging the == icon or tapping anywhere else inside the bottom bar will open the Inspector panel. Inside are three columns of settings for the X/Y Pad:
- AXIS
- LFO
- RELEASE MODE
Axis
The X/Y PAD has two modes: CC and NOTE.
In CC mode, you can choose different CC values for each of the axis. Each axis's value will be sent as a MIDI CC message for the selected MIDI output device and channel.
In NOTE mode, you’ll be able to send note on/off information. The X axis determines the note’s pitch, while the Y axis determines the note’s velocity, with the Z axis (press/release) triggering the note on/off events.
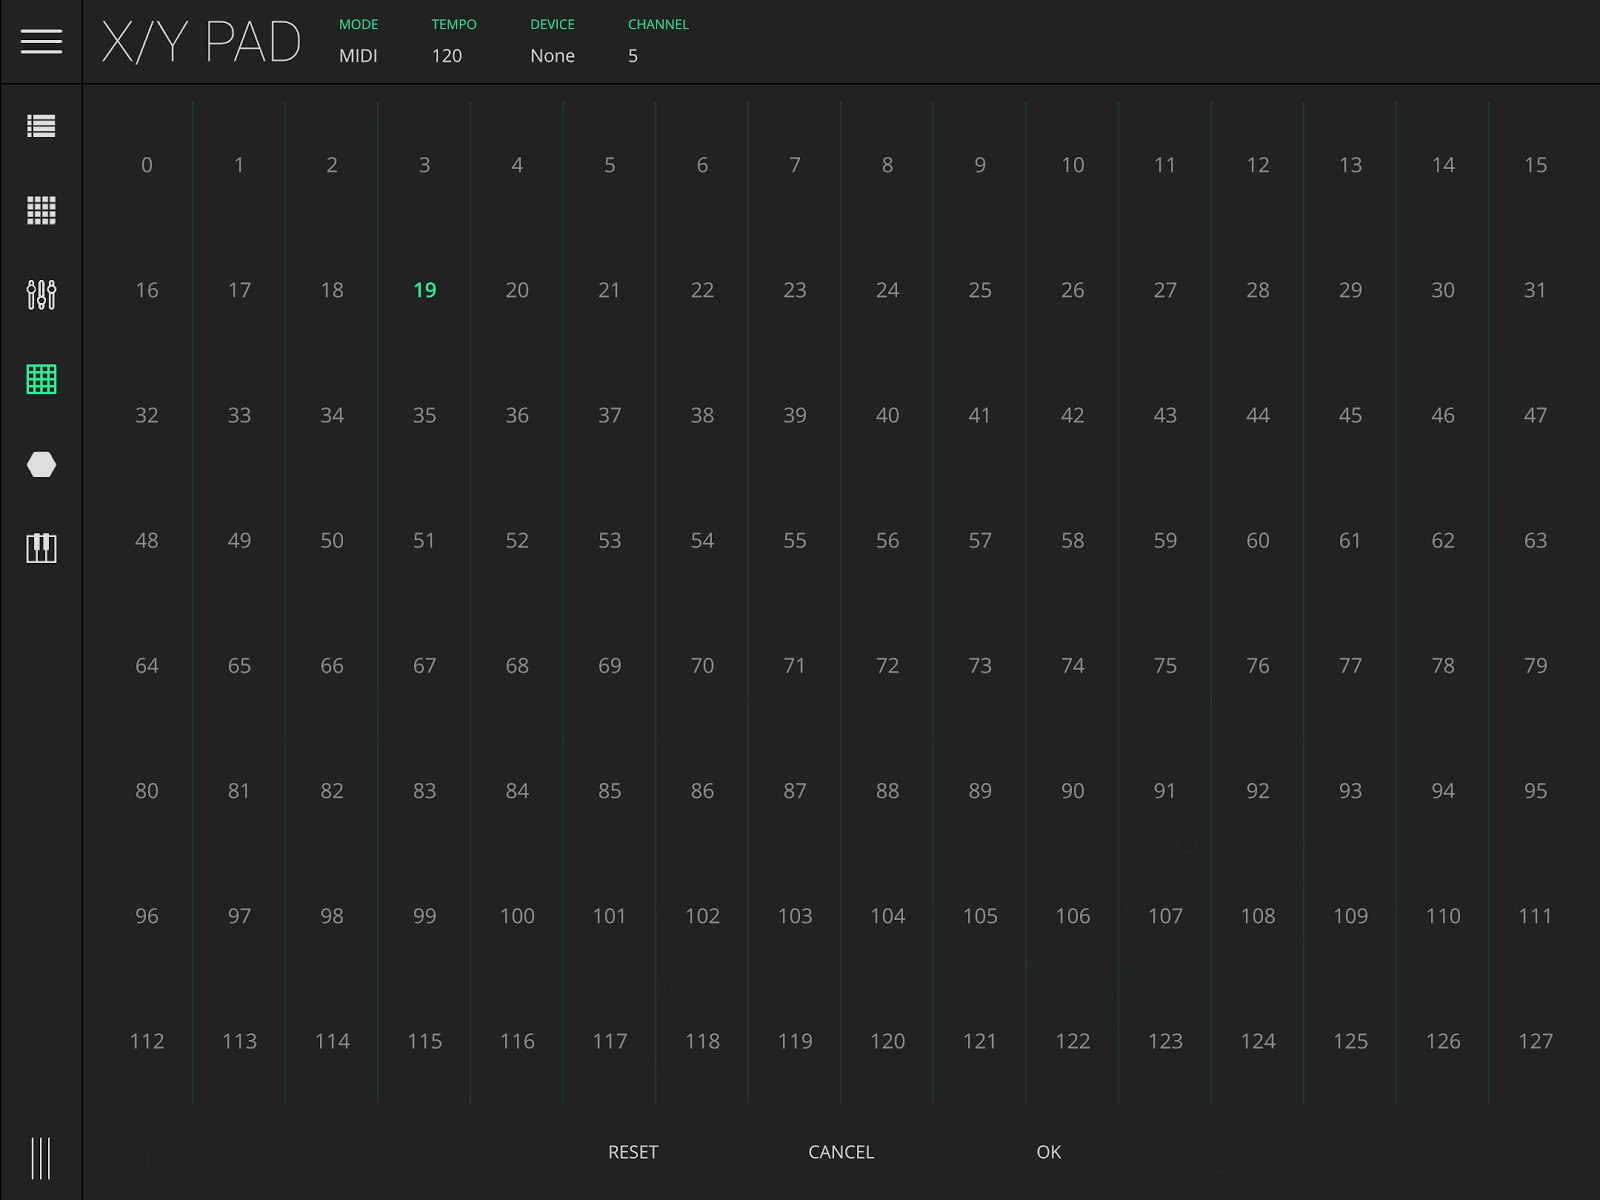
Assigning a custom MIDI CC (MIDI MODE)
Select the axis you want to map by tapping the corresponding button; this will open the MIDI Assign panel. You can select the MIDI channel and CC, as well as the range. Changes to the axis's values will output MIDI CC messages ranging between minimum and maximum.
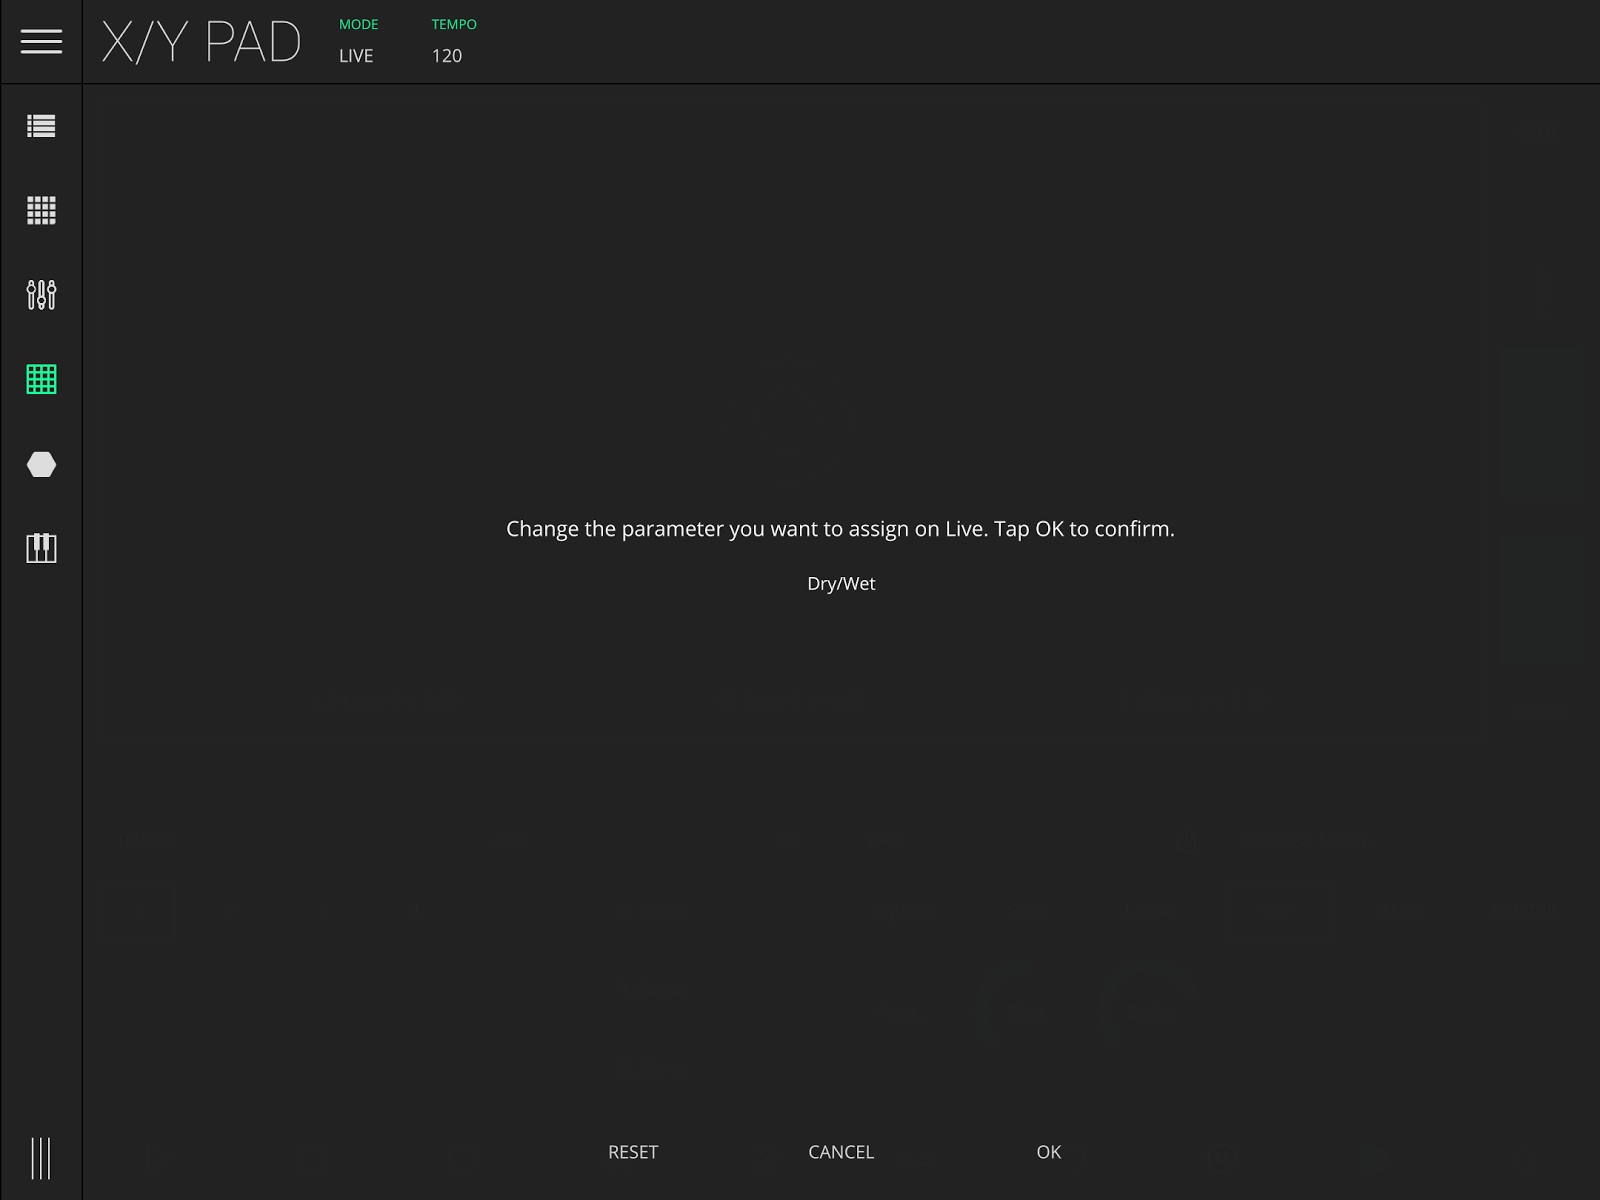
Assigning an Ableton Live Parameter (LIVE MODE)
Select the axis you want to map by tapping its button and change the parameter you want to assign in Ableton Live.
LFO (Low Frequency Oscillator)
The integrated LFO unit provides you with additional modulation control on the X and Y axis. This unit has the following parameters:
- WAVEFORM - Toggle between three different kinds of waveforms: Sine, Square and Saw.
- SYNC - Synchronizes the oscillator frequency with tempo.
- BEHAVIOUR - Determines how the LFO modulates the X/Y position in Pad.
- HORIZONTAL - Modulate the X axis value.
- VERTICAL - Modulate the Y axis value.
- LINEAR - Modulate both the X and Y axes simultaneously.
- AMOUNT - Qmount of modulation.
- RATE - Frequency of the oscillator.
- DELAY - Define the time the LFO will take to start.
Release Mode
Release Mode determines the default position to which the X/Y cursor returns once the pad is released. The ASR envelope's release time also determines how long it takes for the X/Y position to travel to this point.
- OFF - The cursor remains where it was released.
- ZERO - The cursor travels to the bottom left corner (0, 0).
- CENTER - The cursor travels to the center of the pad.